Quantcast
Channel: Droidiser
Viewing all 557 articles
Browse latest View live

Learn English 6000 words is a promising way to boost your English Vocabulary

$
0
0
If English isn’t your first language and you want to increase your English vocabulary by about 6000 words, you would find Learn English 6000 Words a brilliant app to do so.

The app allows you to select words based on topics and subtopics. You have the option to change the language in which you are taught to German, French, Spanish, Italian and English. Once you select Topics and Subtopics, you will see images to illustrate the words. A speaker icon at the bottom right allows you to listen to the way that word is pronounced. The 6000 words in the app are divided into 15 broad topics which are further subdivided into 140 subtopics.

You can test what you have learnt using 7 different games making the learning process a bit of fun experience. The app can choose a random topic, subtopic and game to test you or you can choose all these parts yourself and test yourself on a particular topic only.


The app requires no internet connection to load anything, meaning you can use it on your ease without having to connect to the internet every time you use the app. You can also change the difficulty level to Beginner, Intermediate or Advanced according to how you rate yourself.

Using the app was a breeze. Five points for its simplicity and ease of use. The app didn’t lag on my pretty old Froyo device despite of its fairly large size, means it will run good on most Android phones on the Earth. People who have downloaded the app seems to be loving it as well, as proved by the 4.4 Star rating this app has earned so far.

Learn English 6000 Words is available for free on the Play Store and will work on any Android Device that runs on Froyo or a higher version of Android operating system. There doesn’t seem to be any reason why you won’t want to download this app if your English vocabulary is not that good.

How to install Clockworkmod (CWM) Recovery on Micromax A27 Bolt

$
0
0
Micromax A27 Bolt is one of the cheapest Android handset in the market. Selling at just INR 2,999, A27 Bolt packs a 1 GHz processor, 256 MB RAM and runs the pretty old Gingerbread (Android 2.3).

The paltry amount of ram makes multitasking on this phone not the best experience you will ever have. To tackle such issues, apps like Greenify can help you use your ram in a better way. Many other root only tricks can also help you get the most out of your phone. But before rooting, you might just want to take a backup of your phone in its unrooted state. Even once you have rooted your phone, you might want to keep a full backup of your phone in a working state, so that if any of your after-rooting story doesn’t go as planned, coming back can be easy. This whole full backup thing is made possible with the help of custom recoveries like Clockworkmod (cwm) Recovery.

How to install CWM Recovery on Micromax A27 Bolt

  • Download ADB/Fastboot files here. Extract the file you just downloaded to any folder. We shall be referring the folder in which you extracted the files as ADB folder.
  • Download clockworkmod recovery for Micromax A27 Bolt.
  • Copy the recovery.img file you just downloaded to the ADB folder. Make sure that recovery.img is present in the same folder in which other adb files like adb.exe and fastboot.exe are present.
  • Install drivers for your phone using pdanet.
  • Switch off your Micromax A27 Bolt.
  • Press and hold Power + Volume Down button to boot into fastboot mode. You won’t see anything on your phone regarding the fastboot mode, it will just get stuck on the boot logo.
  • Once your phone is in fastboot mode, connect it to your PC using USB Cable.
  • If on Windows 7 or above, go to the ADB Folder. While holding the Shift key on your keyboard, right click anywhere in the folder and select Open Command Prompt Window Here. If on Windows XP or below, open Command Prompt and use cd commands to jump to the ADB folder. For instance, if ADB folder is present at C:/Downloads/ADB_Folder_Here, then you have to give this command in the command prompt:
    cd C:\Downloads\ADB_Folder_Here
  • Once in the adb folder in the command prompt, give the command
    fastboot devices
  • If your device is listed in the command prompt, all is well. Otherwise, check if you have installed your drivers properly.
  • Now enter this command
    fastboot flash recovery recovery.img
  • Once fastboot flashes recovery on your device, enter this one last command:
    fastboot reboot
  • Once your phone reboots, turn it off again. Now press and hold Volume Up and Power buttons simultaneously till you boot into Clockworkmod Recovery.
Well,we hope that you were able to reproduce the steps just as mentioned without any difficulty., given that the guide is pretty straight forward.

Simple Defragmenter defragments your Android device’s storage to speed it up

$
0
0
Simple Defragmenter is an Android utility which is meant to help you speed up your Android device a bit by defragmenting the storage. According to the app’s description, defragmenting your phone’s storage can boost its speed by up to 40%. We shall talk about this claim later.

Coming to the app, the user interface of Simple Defragmenter is one of the cleanest ones you will ever find. When you run this app, it will analyze your phone’s internal storage. A bar showing the defragmentation levels on your storage will be generated. Clicking on this bar will begin the defragmentation process. Before the defragmentation process is started, a warning message is displayed stating that the defragmentation process will take 1-5 minutes and should not be interrupted. Once initiated, the defragmentation will take its time and complete. After defragmentation is completed, you are asked to repeat the process after 3 days.

I really liked the way ads are displayed in this app. Simple Defragmenter displays ads when some sort of process is going on beyond. It becomes less of an annoyance and more of a time kill to go through the ad when the app is actually perfrming a task, a time at which we are otherwise forced to stare at the screen waiting for the process to complete.


Now, to the real question, is Defragmentation really necessary on an Android device? The answer is no. Neither Android device’s internal storage nor the flash cards need to be defragmented. There is no moving parts in there (unlike Hard Drives in your PC), so seektime is very low and fragmentation on sd card or internal storage doesn’t slow things down. Rather, like SSDs, android storage has limited number of write cycles and defragmenting can cause bad impact on the life of your Android device’s storage.

The developer, when asked about this, confirmed that defragmentation is indeed not required on Android devices. What the app really does is that it puts the chunks of data together. It merges app data and cleans up old files. Simple Defragmenter has shown improvements in reading and writing speeds of the storage.

With that being said, the app doesn’t seem to have any kind of malicious permissions. So, if you have been experiencing lags on your Android phone, you might want to give this free app a try. Download Simple Defragmenter by Simpleapplab by clicking the button below.

Clean applications’ cache using Cache Cleaner to free up some space

$
0
0
Most applications you install on your Android device store cache files and take up some important percentage of your phone memory. Cache Cleaner, a new entry on the Play Store, lets you clear up these cache files at the press of a button.

Cache helps an app to launch faster the next time you open it. Clearing cache doesn’t clear out your preferences or login information from an app. That thing is stored in application data. Application Data and Cache are two different things. Clearing cache will do something you won’t generally notice. So, if you are sitting tight on phone memory, clearing cache can give you some breathing space.

Clean Cache is pretty straight forward and even a layman won’t have any problem using it. When you launch Cache Cleaner, it will index and analyze the applications you have installed on your Android device. This process took barely 5 seconds on my 1.5 GHz dual core processor powered tablet. Snappy. Once the analyzing is done, a pie chart shows you the amount of space used up by your applications’ data and cache. Two buttons above the pie chart allow you to either refresh it or to clear the entire cache.

A swipe to the right allows you to get to the second tab in which all apps are listed individually along with the size of their cache. In the second tab, tapping on any app’s icon will take you to its App Management screen, the default one that you get by going to Setting > Applications. I would have liked it to clear cache of that app only.  Ads have been included quite intelligently in this free app. When the app is busy analyzing your app for their cache size or when you are clearing down cache using the clear cache button, only then do the ads appear. This provides a cleaner feel to the app as most of times you have no ads on your screen at all.


Cache Cleaner should work fine on all Android devices running Android 2.0 and above. This covers over 97% of the android devices present in the world. I didn’t encounter any bug in my 15-20 long stint with Cache Cleaner.

Verdict:

Recommended. A minimalistic Android utility to help you gain some crucial megabytes of phone memory. Cache Cleaner doesn’t cost anything and is thus, more than worth a try.

How to install custom rom on Samsung Galaxy S Duos: KyleOpen, PMP Ultra & PMP Light

$
0
0
Samsung Galaxy S Duos sprung back into action in the Indian market after its pricing was reduced drastically. Now selling for about INR 9,000, a price it should have originally been launched at, there is a lot of demand for this phone in the market. This explains why the Rooting guide for Galaxy S Duos has been one of the most popular articles here at Droidiser.

Galaxy S Duos runs on an outdated Cortex A5 processor and 768 Megabytes of RAM. To make the condition more miserable for its owners, Samsung never bothered to release any update for this phone, which explains the reason why this phone is still stuck on Android 4.0.4, the Android version that the phone came aboard with at the time of its launch. All these factors collectively cause a user to want to switch to a custom rom. After initially being ignored by the developers, Galaxy S Duos has three popular custom ROMs at present: KyleOpen ROM, PMP Ultra ROM and PMP Light ROM. KyleOpen was the first custom ROM for S Duos. While PMP Ultra and PMP Light came much later, they have gained some good feedback from those who have given these a try.
I am not going to answer the question most of you will be probably asking at this point: Which custom ROM is the best? Ileave that question for you to answer. To help you out on the answer, I shall recommend you one thing: Download all three roms. Install them one by one and spend a week on each of them. Then stick to your favorite. All these ROMs will give your phone a refreshed look and will, most probably, impact the performance of your device in a positive way.

Downloads:

Note: Head over to the original thread for any bugs you face, an update you seek, an add-ons or probably anything you can think about the rom.

How to install custom rom on Samsung Galaxy S Duos S7562:

  1. If you haven’t already, root and install clockworkmod recovery on your Galaxy S Duos.
  2. Copy the file(s) you downloaded from the downloads section above to your phone. Paste them outside any folder i.e. in the root directory of your storage.
  3. Switch off your phone.
  4. Boot into clockworkmod recovery by pressing (and holding) Volume Up, Volume Down, Home and Power button till you boot into recovery.
  5. Using Volume up and Down to navigate and power to select, select Wipe data/factory reset. Then go to Advanced and select  Wipe Dalvik Cache.
  6. Finally, select Install zip from sdcard and locate the rom file you want to flash.
  7. Once the installation completes, select Reboot system now.
If you were trying to install PMP Ultra or PMP Light ROM, you will have to install the lowest version first i.e. version 2.5 in case of PMP Ultra and version 7 in case of PMP Light. Once you flash that, reboot your phone. Boot in to clockworkmod recovery again and flash the next update package using step 5-7 given above. Repeat this process till you have flashed the latest update package.

Here's how your phone can look after installing any of these three roms!

Do leave feedback about any of these custom rom you install on your Galaxy S Duos. If you face any installation prblem with any of these ROMs, drop a comment and we shall try to help you out.

Only one word of caution for this guide, don’t try these custom roms on any device except Samsung Galaxy S Duos GT S7562.

Karbonn A12+ Review: Redefining Value for Money [Exclusive]

$
0
0
After spending last few miserable months with my now-ex Spice Mi 310, I finally got a chance to reward myself with a new smartphone. As I had recently bought a laptop, I was quite tight on budget. Amazed by the specifications of the just launched Karbonn A12+, I ordered one when it was priced at INR 4650 on Flipkart and received it two days back. This is a detailed review of the Karbonn A12+.

Disclaimer:

As this is the first on net review of the Karbonn A12+, you might have your doubts over whether you should trust what I am saying. This isn’t a sponsored review and every single word I have wrote is true to the bottom of my heart.

Summary:

This review became mammoth as I went through all the details. If you are not a reading bug, chances are that you won't be able to go through it all. So, I have categorized everything to help you out. Note that the ratings I have given to this device are based on what we are getting in light of what we are paying.
TopicOur Rating
Box Pack Contents☻☻☺☺☺
Technical Specifications☻☻☻☻☻
Design and Build Quality☻☻☻☻☺
Processor☻☻☻☻☻
Storage☻☻☻☻☻
RAM☻☻☻☻☺
Benchmarks☻☻☻☻☻
Display☻☻☻☻☻
Camera☻☻☺☺☺
SAR Value☻☻☻☻☻
Music☻☻☻☻☺
Touch☻☻☻☻☻
Connectivity☻☻☻☻☻
Battery☻☻☻☻☺
Video Playback☻☻☻☻☻
Gaming☻☻☻☻☻
Software☻☻☻☻☻
Conclusion4.5 out of 5

What you get out of the box:

Nothing extraordinary at all. Besides the smartphone, we get a USB cable, which is used to charge the phone as well as to connect it to the internet, the charger itself, earphones, an information booklet and a list of Karbonn Service Centers. Talking about the quality of accessories, this is one of the very few areas where this phone let me down. The earphones that come along with the Karbonn A12+ are miserably poor and you’d like to invest in a new earphone as soon as you can.

Puzzle Time: There is one thing missing from the contents. Guess what? Answer at the end.

Technical Specifications:

  • Android 4.2.2 Jelly Bean
  • Connectivity Options: Dual SIM: 3G/2G, WiFi, GPS with A-GPS, Bluetooth with A2DP
  • GSM: 900/1800 MHz, UMTS: 2100 MHz
  • 1.3 GHz Dual Core Processor (ARMv7)
  • Mediatek MT6572 Chipset
  • 512 MB RAM (470 MB User Available)
  • 4 GB Internal Storage (671 MB for System partition, 1.36 GB for applications, 1.33 GB for internal sd card)
  • 10.1 cm Capacitive Touchscreen
  • IPS Display with 480x800 (WVGA) resolution
  • 5 MP Rear camera with flash, snaps photos in 2560x1920 and videos in 720p resolution
  • 2 MP front camera, snaps photos in 1200x1600 and videos in 480p resolution
  • 1400 mAh Battery
  • G-Sensor, Proximity Sensor
  • Mali 400MP GPU

Design and Build Quality:

The first thing you will notice when you hold a Karbonn A12+ in your hand is the weight. It feels really light and is quiet sleek. A display size of 4 inch means it can be operated using a single hand easily. There is absolutely nothing on the right side and on the bottom of the phone. The left side of the phone has Volume buttons. The upper side seems a bit more crowded with a 3.5 mm headphone jack, mini USB port for charging and the Power button. I would have personally liked the Power button on the right side. The buttons look quite sturdy and as it seems, will not wear out any soon. The display comes with a cheap screen guard on it which you will need to get replaced pretty soon, in order to prevent the display from incurring any scratches.

The phone looks much better than some other phones in this range. It has a rectangular design and a silver metal lining runs across the boundaries. The phone is made up of plastic but doesn’t look cheap at all. The back cover tightly fits the phone and doesn’t bend or anything  when you remove it to get to the battery compartment. A drawback I found here is that you can’t insert or remove external sd card without removing your battery.

Karbonn A12+ is available in two colors: Grey and White. As you can see in the shots, I have got the Grey one as I find it to be evergreen. I usually get bored of the whites within days.


Testing the Hardware:

So, that's what the Karbonn A12+ looks like on paper. Let’s see how it actually fares in the real life.

Processor:

Mediatek’s MT6572 is world’s first dual core SoC (system on chip) with integrated WiFi, Bluetooth, FM and GPS, thus reducing the effective cost price. Clocked at 1.3 GHz, I am quite impressed by the MT6572 from Mediatek. Coupled with 512 MB RAM, Karbonn A12+ runs smoothly and multitasks with ease. If you had your doubts about whether 512 MB RAM would be able to run Jelly Bean smoothly, clear them. MT6572 is one of the driving forces behind the affordability of Karbonn A12+.

Storage:

Right now, I have about 39 user applications installed on the Karbonn A12+, in addition to the default ones that come loaded with the phone, but there is still no observable lag. Apps start up fast, switching between one app to other is smooth and apps don’t get killed in the background too often. I rooted the phone yesterday and am using Greenify to hibernate some of the background processes but can testify that even before I had done that, the performance was good.

The storage location of apps and games can be set to external sd card or phone’s storage. I chose the former as I have a 16 GB sd card. All the applications which support move to sd card can thus be moved to the external sd card. After installing those 39 apps, which cover almost all my daily needs, my storage stats are as follows:
  • Internal Storage (the one for installation of apps): 405 MB used, 900 MB free
  • Internal sd card (aka Phone Storage): 1.24 GB total, 1.23 GB available
As I haven’t stored any of my files in phone storage and apps, by default, move to the external sd card, Phone Storage is almost empty.

RAM:

Talking about RAM, when I don’t have any app running in the background, I get about 150 MB free RAM. That is because some of the 39 user apps I have installed and a few system apps keep running background processes. When we have multiple apps open (8-10), free memory drops down to around 90 MB. Of course, after rooting, we can use Memory optimizer apps to change the way system handles RAM and thus keep more free ram at our disposal. Still, for an average user, this much of RAM will suffice for daily usage even without rooting.

Another point I would like to mention here is that most phones in this range that come with Android 4.2 and the very same processor come with only 256 MB of RAM (like Iris 402, Iris 356, Intex Cloud Y2 etc.) and thus, Karbonn A12+ has a very big advantage here as another 256 MB of RAM can really do wonders to help in the smooth performance of an Android device.

Benchmarks:

Here are the benchmark scores I got:

Quadrant: 3239
Antutu: 8244
LinPack Single Thread: 56.798
LinPack Multi Thread: 80.663

I have seen people get much better benchmark scores than these on the very same phone (about 4000 on Quadrant and 10800 on AnTuTu) but as long as my phone runs my daily tasks smoothly, I don’t give a damn to benchmarks. And as experts concluded after reports stating Samsung was boosting benchmark scores, you shouldn’t care about these too.
Still, as a comparison to Android devices in the same price range, Karbonn A12+ blows others out of water. To compare these scores with other devices, google ”Benchmark Scores Android_mobile_you_wanna_compare”.

Display:

Ok, I shall try not to sound like a fan here, but the display is the USP of the Karbonn A12+. The IPS display along with the 240 ppi pixel density makes colors pop out of the screen. Karbonn A12+ has one of the best viewing angles you will ever see in a mobile phone. Colors look true no matter from where you look at the phone. Karbonn A12+ easily beats my Dell Inspiron 3421’s screen in this matter. At maximum brightness, the display is bright enough to look at even under direct sunlight.

Camera:

If you were too excited by the 5 MP camera specification, you will probably see this as a letdown. Karbonn A12+ snaps decent images in daylight but in poor lighting conditions, the 5 MP shooter will disappoint you. Auto-focus is missing in the camera, as one would have expected at this price point. Though the camera apps shows the AF animation and the focus sound, but nothing actually happens. In comparison to the stills, I liked the 720p videos the rear camera shoots. By default, the videos shot by the rear camera are in 480p. To get 720p videos, press the gear button, swipe to video options and change Video Quality to fine.

The front camera is an even bigger disappointment. It really needs to adjust to light exposure in a better way.

The images of the box pack (above) are shot using the Karbonn A12+’s rear camera. The camera fares a bit better outside as you can see below. I am also attaching snaps I took using the front camera.
 Tip: Click on any thumbnail to see original image


Video Sample:

SAR Value:

When it comes to the impact of smartphones on our health, the first technical term, if any, that would arise in most minds is SAR value. Quoting the user manual that came with the Karbonn A12+:
The radio wave exposure guidelines employ a unit of measurement called Specific Absorption Rate (SAR). The recommended SAR limit for mobile handset is 1.6 W/kg averaged over a 6 minutes period and taken over a volume containing a mass 1 g of human tissue. The highest SAR value for this mobile phone model is 0.785 Watt/kg over a 6 minutes period and taken over a volume containing a mass 1 g of human tissue.
Don’t blame me if this sounded like a horrendous Physics definition (God, I hate Physics), but the better part is that the SAR value of Karbonn A12+ is way below the maximum acceptable. Many phones from these lesser known brands don’t even have this value mentioned. We surely appreciate this, Karbonn.

Music & Speaker:

The speaker on this handset is pretty loud and clear. When I heard the word loud in an earlier review on Flipkart, I was worried whether the loudness was like that found in speakers of Chinese mobiles. But thankfully, the sound output is quite clear too. You will miss Bass in the output, but treble almost makes up for it. The speaker is placed at the rear side of the phone, so you might need to rest your phone on its screen while putting it on a surface which absorbs sound.

Touch:

Karbonn A12+’s touch sensitivity is great. As expected from a capacitive touch screen, even the lightest of the touches are recognized. No issues in the touch section so far. Fyi, Karbonn A12+ has a 5 point multitouch touchscreen, though we rarely use more than two fingers at the same time.

Connectivity:

Though I talk really less and even lesser on my phone, till now, I didn’t face any dropped calls. I am using both the SIM slots and network on both of them is pretty stable. I could hear the person at the other end perfectly loud and clear. Not so sure about whether this was the case at the other end too, but I wasn’t repeatedly asked what I just said so I assume that the mic is clear too. Despite googling a lot about how I could get to know what Bluetooth version is present on the Karbonn A12+, I couldn’t figure it out. Transferring file over Bluetooth reaches speeds of about 125 kbps and you can send files to multiple devices at the same time. WiFi, WiFi Tethering and USB Tethering work as expected. Karbonn A12+ also supports WiFi Direct, a technology that allows you to send and receive files over WiFi. Bluetooth Tethering can be used to tether devices which have Bluetooth but no WiFi.

Battery:

I haven’t really put the Karbonn A12+ away for a second. Most of the time, it is connected to my laptop through USB cable and keeps charging there. I played a 720p video on loop (but the audio was muted) for about 1 hour and the battery dropped by 9%. On standby (with Data, WiFi and GPS off), the phone lost 1% battery during my 9-10 hours of sleep. I shall post an update about battery later but as of now, I can assure that the battery is not poor and would last a day of normal usage. Update: Yesterday, I charged the phone to a full 100% at 10:30 pm. I used the phone till 12 am. Since I woke up today at 8 am, I used the phone non stop and the battery breathed its last at 12:30 pm. That means the phone lasts around 6-7 hours of heavy usage plus 8 hours of standby. The heavy usage, in this case, included gaming and 3G internet surfing and using the phone as Hotspot to tether my laptop to internet. I am pretty sure that on a full charge, Karbonn A12+ will easily last a full day of moderate usage.

Video Playback:

Though Mediatek officially states that MT6572 doesn’t support 1080p videos, even the default video player plays 1080p videos, though with some (bearable amount of) lags. 720p videos play as smooth as they proabably can. Coupled with the loud speakers and the wide viewing angles this phone has, watching movies on the Karbonn A12+ with your friends can be fun. As many of you might already know, MX Player enhances your video playback experience even further, so you can try that too.

Gaming:

I don't have much data lying around on my internet connection, so I couldn't download any hd game to test on this phone. But I did try the APK files of games I already had. Subway Surfers and Temple Run 2 run as smooth as they would on a high-end phone. All the latest HD games with large sd data are showing as compatible in the Play Store, so they will most definitely work well on the Karbonn A12+. Update: Other Karbonn A12+ users have reported that HD Games like Asphalt 8, Modern Combat 4, Real Racing 3 and others are running without any lags, which is obviously brilliant for such a low priced device. I have myself tested Dragon Slayer and Ironman 3 on the phone and both of them worked flawlessly. My last phone (Spice Mi 310) couldn't play most games but when I used it as a 3G hotspot, it became as hot as a "tawa". Though that helped in the winters, I really don't want my phone to be that hot. Karbonn A12+ doesn't heat up on heavy gaming, eanbling 3G, WiFi hotspot, charging or doing all this at the same time!

Software:

Karbonn A12+ runs on almost stock Android 4.2.2. I used the word almost because there are some apps that come pre-installed with this phone in addition to the stock Apps. These apps included Hungama, Karbonn Live, Kingsoft Office, Times of India, UC Browser, Opera Mini and WhatsApp Download. Almost all of these apps were either useless or outdated. Though usually deleting such pre-installed apps is not possible, a factory reset deletes all of them and you are left with clean, stock Android. No customization from Karbonn at all makes using Karbonn A12+ kinda Nexus experience. By default, transition animations are turned off and this kills the flaunt factor of the UI. So, I enabled them by going to Developer Options and setting Transition Animation Scale and Animator Duration Scale both to Animation scale 1x. If you get yourselves this phone, do do this thing. The transitions between apps look 10x better this way. In Android 4.2, Developer Options are hidden by default and need to be unlocked by going to About Phone and tapping on Build Number seven times. But strangely, the Developer Options were visible by default though. Not something to worry about, just mentioned this because I noticed it.

Jelly Bean Sweetness:

When you connect your phone to PC using a USB Cable, you get various options one of which include Charge Only. Charge Only mode allows your phone to charge fastly when connected to your PC. Another option worth a mention is USB Internet, which allows you to share internet from your Windows PC to your phone. This feature, earlier called reverse tethering, required you to root your device and install a few things, but as is evident, this option is available in Android 4.2. Another option worth a mention in Android 4.2 is the Scheduled Power On & Off. As the name suggests, you can set your phone to automatically switch on or off at the time you decide.

Conclusion:

Grey                          White Karbonn A12+ is available at Flipkart for INR 5,199 and it is worth every single penny. If you are not a shutterbug (and you can’t be one in that budget), Karbonn A12+ is the best smartphone that you can get at this price point. Just for a matter of fact, Flipkart delivered this phone to me in 2 days. After having a look at my phone, one of my friends ordered one too. Note: If you buy using the Flipkart widget embedded above, I shall get a tiny commission. So, if you appreciate my efforts and have decided to buy a Karbonn A12+, please do that by clicking the Buy from Flipkart.com button above. If you can't see the widget, get yourself a Karbonn A12+ here(grey one) or here(white one). Thanks to those who did. :) If you think I missed out on any aspect, let me know in the comments. If you have any question about this phone, again, let me know in the comments. As I mentioned in the review, I have successfully rooted this phone and will be posting a easy how to guide for that. Don’t ask me to do a video review, because I don’t have a decent enough camcorder and I guess that I have made everything as clear as possible through words. P.S. If you bought yourself a Karbonn A12+, you might consider 
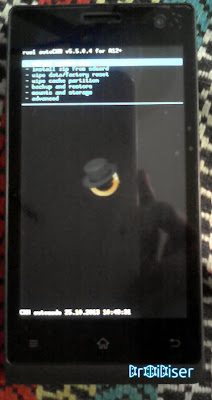
rooting it. Even further, installing clockworkmod recovery on it will help you restore in case of bricks or bootloops. Answer to the puzzle: Karbonn A12+ itself is missing from this shot :P

Karbonn A12+ on Droidiser: Complete Coverage

The only development work, if any, is occurring on Karbonn A12+, it is bound to be Droidiser, at least upto now.

How to Root Karbonn A12+: Rooting Guide for Newbies

$
0
0
Karbonn A12+ is one of the best android phones you can buy a the present time for INR 5,000, as we already told you in the Karbonn A12+ review. While the average user won’t need to root it as the phone already has good amount of storage, many advanced users, like me, can't live without some of the root only perks. To help out those among us, I am here with an easy rooting guide for the Karbonn A12+.

Before you proceed:
  • Make sure that you know what you are doing. If you aren’t aware of what rooting is, you probably won’t be able to make the most out of it.
  • Rooting the Karbonn A12+ will void your manufacturer warranty. Unrooting the Karbonn A12+, though, is as easy as rooting it and thus you can regain warranty when you want to.
  • To make the most out of rooting your Karbonn A12+, it is recommended to install Clockworkmod Recovery so that you can have a full nandroid backup that you can restore easily at the first hint of panic.

Rooting Karbonn A12+ in 8 easy steps:

  1. First and most importantly, you need to install drivers for your phone on your Windows PC. To do that, either use Pdanet or use Universal ADB Drivers. I had already installed Universal ADB Drivers so the phone was recognized by the rooting tool without any problem.
  2. Download and install SRS One Click Root on your PC.
  3. On your phone, go to Settings > Developer Options and tick USB Debugging to enable it.
  4. Connect your phone to the PC using USB cable. Slide the notification bar down and make sure that your phone is connected as USB Storage. If it isn’t already, you can change it to USB Storage by tapping the Touch for other USB options notification.
  5. Open SRS One Click Root app on PC. Select the option that says Root Device (SmartRoot).
  6. After a while, your phone will ask if you want to install the application SRS Root is sending you over ADB. Tick the checkbox and select Install.
  7. When a popup appears on your phone asking you to choose the exploit, select Install SuperSU and click on Bormir. A Success message will be displayed on your phone as well as PC.
  8. Reboot your phone and check if you are rooted.
Refer the video below if you have any doubts:

Unrooting Karbonn A12+:

  • Hoping that you are using the same PC that you used to root your Karbonn A12+, connect your phone via USB cable. Make sure that the phone is connected in USB Storage mode.
  • Open SRS One Click Root application on your PC. Click the Unroot Device button.
  • Wait for the process to complete. Once it does, your phone will automatically reboot.
I uploaded a video for the unrooting process too:

Though I have done my best to clear things in an elaborate way. Don’t hesitate in asking even the silliest of the questions. Do install clockworkmod recovery using this guide so that you can recover from the worst possible situations in the future.

Karbonn A12+ on Droidiser: Complete Coverage

The only development work, if any, is occurring on Karbonn A12+, it is bound to be Droidiser, at least upto now.
How to Root Karbonn A12+
Change boot logo and animation on Karbonn A12+
How to install clockworkmod recovery on Karbonn A12+
Enable Daydream mode on Karbonn A12+
Karbonn A12+ Detailed Review

How to Install Clockworkmod Recovery (CWM) on Karbonn A12+ [Exclusive]

$
0
0
Recently, we have been covering the Karbonn A12+ smartphone. Earlier, we did a detailed review of the budget smartphone and posted a guide to help users root and unroot it.

Once you have rooted any Android smartphone, the next step is to install a custom recovery so that you can have full nandroid backups which can be restored in case anything goes wrong. For more details on clockworkmod recovery and why you might want to install it on an Android device, read this article.

There are two methods to install clockworkmod recovery on your Karbonn A12+. The main methodology behind both of them is the same, it is just that one of them makes the task easier for you.

Note: I have ported the Clockworkmod Recovery to Karbonn A12+ myself, thanks to MTK Droid Tools. All the options in clockworkmod recovery are working to the best of my knowledge. If you find any bugs, do report. Please don't mirror the file and wherever you share the link, keep a link to this article.

Installing Clockworkmod Recovery on Karbonn A12+

The Lazy Method:

If you are sure that you have installed proper drivers for your phone on your Windows PC, use this method. Else, skip to the other one.
  1. Download and extract CWM Droidiser Toolkit for Karbonn A12+.
  2. Connect your phone to the PC using USB cable. Make sure that the phone is connected as USB Storage but USB Storage is turned off.
  3. Enable USB Debugging on your device by going to Settings > Developer Options.
  4. In the extracted folder, run the Double Click This.bat batch script.
  5. Follow the instructions in the command prompt.
  6. Running that script file will install the Mobileuncle app on your phone and send the recovery.img to your sd card.
  7. Open your phone's app drawer and run Mobileuncle Tools app.
  8. Select Flash Recovery from sdcard option.
  9. Tap on recovery.img and then confirm the process in the popup dialog.
  10. Your phone will automatically reboot into recovery.
The Normal Method:
  1. Download and extract CWM Droidiser Toolkit for Karbonn A12+.
  2. Copy the Mobileuncle.apk and recovery.img file to the root of your sdcard. Here, root of the sdcard means outside any folders and the sdcard to be used is the external sdcard.
  3. Install Mobileuncle.apk file using any file manager on your phone. To do this, you must have enabled installation of apps from Unknown Sources. This can be done by going to Settings > Security > Unknown Sources.
  4. Run the Mobileuncle Tools app and select the Flash Recovery from sdcard option.
  5. If recovery.img is copied to the correct location, it will appear in Mobileuncle Tools at this point. Tap on recovery.img file and you will be asked if you are sure about what you are doing. Confirm the action.
  6. Your phone will automatically reboot to recovery mode.
This video shows how the process appears runs on the phone.

Though the phone will automatically boot into recovery mode for the first time, later on you will have to do that by pressing a key combination. When your Karbonn A12+ is switched off, press and hold Volume Up and Power button. In the subsequent screen, you will be presented with the option to boot in to Fastboot Mode, Recovery Mode or Normal Boot. Use Volume Up button to scroll through the options and to get to the Recovery Mode option. Now select this option by pressing the Volume Down button and you will be welcomed in the recovery mode.

Karbonn A12+ on Droidiser: Complete Coverage

The only development work, if any, is occurring on Karbonn A12+, it is bound to be Droidiser, at least upto now.


DocLinker for Android lets you scan, create and fill documents on the go

$
0
0
Many-a-times, we get hold of some crucial information while we are on the go. Coupled with a decent camera on your Android device and the DocLinker app, you can create PDF files while you are on the move. The app also allows you to fill forms by adding signatures and more.

Creation of a new document can be done by either capturing a photo using Camera or importing content from an existing PDF file. When you use your camera to create a document, the app tries to automagically detects corners of the document you snapped, though this doesn’t work 100% of the time. Obviously, you are allowed to correct that manually. Cropping the document and correcting the perspective work as expected. You also get the option to enhance the text in the image you capture by changing its brightness and contrast. Changing the order of the pages is fun to do by dragging & dropping the page to the desired position. The document you create can exported to pdf, shared, or printed via Google Cloud Print service. Other useful function of Doclinker is to add text, image or signature into a pdf document. The signature added could be of different colors and stroke size.

Talking about the user interface of the app, DocLinker has a polished UI and makes good use of Android design guidelines. On the first run, you are provided with instructions on how to use the app efficiently. The app is quite a memory hog with the apk size being 15 MB but thankfully, it can be moved to the sdcard. DocLinker can be installed on Android 2.2 and above, so that’s pretty much covers every Android device on this planet.


Here is a sample pdf file I created using the free DocLinker Lite app. Given a better camera and the full version of DocLinker, you can get much better results.
The free version includes many limitations:
  • Exported documents bear doclinker watermarks at the top, bottom and center of the page
  • Only two pages per PDF you create
  • Existing PDFs cannot be imported
  • Ads
All these limitations make one thing clear: If you find DocLinker useful enough, you will have to buy the paid version of the app which will cost you $1.99 but for the productivity benefits you will enjoy, the dev isn’t asking too much.

Active vs. Passive: Samsung S4 Active or Regular - Which one suits you better?

$
0
0
If you’ve settled on a top-of-the-line Samsung Galaxy S4 for a smartphone/life companion, you will then need to decide whether the S4 regular or S4 active is the right best friend for you. With hundreds of positive reviews on the Samsung network site, as well as thumbs up from techno-gurus like CNet and Stuff, you already know that you’re getting a zinger of a phone. But for some outdoorsy types who need a virtually impenetrable, smashable device to keep around, you may only want to consider the Active version, as the regular S4 is very nice to look at, but oh so delicate to hold. Both phones are advertised at the same price, with similar monthly plans from providers like T-Mobile and Orange. Also in the family are little siblings the S4 Zoomfor dedicated photographers seeking convenience, and the S4 Mini.

While both the regular and Active S4 phones do focus on your health through the S Healthfeature which tracks your exercise, calculates your daily food intake, and gives you fitness recommendations based on your body type and size, only one of the two is going to withstand lots of running and jolting about. With the Active, you will lose a few perks: your camera MP will go down from 13 in the regular to 8, and your HD screen will be TFT rather than AMOLED. Your phone will be taller, wider, heavier, and necessarily clunkier, as it’s accented with hardy rubber and metal rivets. Your touch buttons are replaced by three under-the-screen controllers, which survive hard or wet conditions better than the touch-response ones.

But the benefits are pretty outstanding: with the S4 Active you can listen to music (via waterproof headphones - not included) and take photographs underwater with the Aquasetting that frames your shot and lighting just right for deep seas or swimming pools. The Active is waterproof for up to 30 minutes at a depth of 1 metre. Its IP67 certification makes it dustproof, waterproof and ideal for rugged treatment any day of the week and in virtually any temperature.

As a fair warning to all users who plan to take their Active with them underwater as Samsung advertises, the regular warranty for the phone does NOT cover water damage. Be prepared to pay for it if you do use your phone heavily with water, should something go wrong. All in all, the Active is a tradeoff - you gain some weight and bulk, lose some of the sleek touch-only display, and gain the ability to destroy your phone without actually destroying it. Not necessary for the everyday smartphone user, but a jolly good purchase for those who work outdoors, play outdoors, or have small children.

Thankfully for you, whether you’re active or not, both phones have Adapt Display and Adapt Sound built-in to them, so that your audio, video and display experience will be entirely customized and optimized to your best health. If the screen is too bright and the optical reader understands that your eyes are tired, the display will dim. If the phone is too close to your ear and you’re trying to converse in rush hour traffic, the audio will balance itself so that you can hear but the decibel level will not harm you.

Once you’ve made your decision, supercharge your user experience by delving into the how-tos of some tips, tricks and hidden features of your S4 Activeor your S4 regular. Learn how to take a screenshot, customize the LED indicator and set a timer to turn on or off your WIFI. Whichever phone you choose, bundle it up with the right external accessoriesif that rugged look or sleek face is something you want to treasure for the long-haul, and you’ll have a running or swimming mate for life.

How to Get the Most out of Your Samsung Galaxy S4

$
0
0
If you’ve joined the Droid side of the war between Apple and the other smartphones, chances are that you have your hands on a Samsung Galaxy S4. The S4 not only takes the cake as one of the most beloved phones of the year, but also purports to be a “life companion”, which certainly sounds like one step up from the handy pocket computer role that smartphones have traditionally served. “As a life companion, the Samsung Galaxy S4 brings us closer and captures fun moments when we're together,” says the company in their promo material for the phone. Yes, the Samsung advertises itself not as a phone but as a “friend” who makes your life richer, simpler and more fun.

What takes the device from phone to companion, you ask? The special features that you might never think of adding to a mobile telephone, but that serve to add that little extra something to the S4 that we aren’t seeing from many other phones on the market. The unprecedented optical reader, the Dual Shot camera mode that includes the photographer in pictures - like Photoshop, without the work, and the additional free storage of up to 50 GB on Dropbox. To get the utmost out of your new S4, do exactly what the Korea-based phone designers are asking you to do: treat it as a mate, not simply a do-everything phone.

Use the S Translator to translate books, emails, and documents in foreign languages even better than the pre-existing Google Translator, since you can now type or say your speech with voice recognition. Use it as a remote control by hooking the S4 up to your home entertainment system, or whole house for that matter, and using it to surf channels, find recommended shows based on your likes and dislikes, or adjust various settings on your television. Use the Air Gesture feature to pick up a call with a simple wave of your hand, as if a friend were there to answer it for you.

With such a host of bells and whistles, you may be wondering how to find them all, learn to use them, and weed out the ones that will be useful to you from the unnecessary extras. The Galaxy’s impressive website doesn’t emphasize its speedy Quad/Octo processor and expandable MicroSD storage, but instead divides the S4 features into Fun, Relationship, Life Task, and Life Care to make them as personable and down to earth as possible. “Each feature is designed to simplify and enrich our lives and the phone is even smart enough to monitor health and wellbeing,” states Samsung.You may think a phone that supposedly looks out for you in such a chummy manner is a laugh - but think again. The Adapt Sound, Adapt Display and S Healthfeatures actually trigger the phone’s audio, video, and lighting to respond and change to your hearing and eyesight according to what feels natural to you. No more too-bright screens at night or too-loud music as you exercise. The phone simply won’t allow you to be bad to your body. The retina readers built into the front of the device catch your eyes and make eye-controlled scrolling available when your fingers don’t feel like it. The S4 is happy to calculate your daily food intake, exercise achieved, and bodily statistics. And, like a friend, it will even let you know if you’re comfortable or could use a change in temperature, humidity, or stress level.

The Galaxy is aptly named - the TouchWizuser interface literally comes with a smorgasbord of endless features that are universal, comprehensive, and put the power into your hands. Optimize your phone’s performance by boosting its battery life, get the best accessoriesto protect and display your S4, and you may just find yourself with a friend for life. Perhaps Samsung says it best, and most strangely when we remember that we are, after all, discussing a piece of metal and plastic containing a few computer chips and some noisemakers, “To put it simply, the Galaxy S4 is there for you.” 

How to enable Daydream Mode on Karbonn A12+

$
0
0
Karbonn A12+ has been the phone we've been recommending recently for a budget of around INR 5,000 ($82). Though Karbonn A12+ runs on Android 4.2, it is missing a nice feature called Daydream. It might look like the feature is missing from the device, it isn't actually missing but is invisible to most eyes. We found out where it was hiding and thus sprang up with this article to disclose the top secret location of Daydream in Karbonn A12+.

What is Daydream?

Daydream is a modernized version of the screensaver mode we were so used to in those good ol' Java powered handsets. When we either dock or charge our Android, the display usually stays off. Daydream mode allows us to view useful information when display timeout is reached at those times. On Stock Android, Daydream mode can be activated by going to Settings > Display > Daydream. As you might have expected from what I wrote earlier, display settings in Karbonn A12+ are devoid of an option to activate Daydream.

Enabling Daydream Mode on Karbonn A12+:

  • Given you are using stock launcher, open the App Drawer.
  • Tap the Widgets tab to get to the widgets or swipe through all the apps to get there. (Depending on which launcher you are using, getting to Widgetss screen might differ.)
  • Find the Widget named Settings Shortcut. Long press this widget and drag it to your home screen.
  • Once you drop it on your preferred home screen, a popup window will open asking you to what Setting you want that shortcut to take you.
  • A Daydream option is lying stealthily here. Tap on it to create a shortcut to it.
  • Tap the shortcut which you just created.
  • Select the widget you want to use for Daydream mode. Most of the times, I use Clock. Depending on what third party apps you have installed, these options might vary.

By default, we have a few options to choose from in Daydream mode: Clock, BeanFlinger, Colors, Photo Table and Photo Frame.

BeanFlinger options need to be unlocked to get access to it. It can be unlocked by going to Settings > About Phone. Now, tap on Android version a few times repeatedly. Tap on the Jelly that appears and then long press on it. This will unlock BeanFlinger option in the Daydream mode.

Though it is one of the easiest things to do on Android that I have made a guide for, if you still have any difficulty accessing the Daydream mode on your Karbonn A12+.

Change Boot Logo and Boot Animation on Karbonn A12+

$
0
0
Agree to it or not, seeing the same ol’ boot logo and animation every time you switch on your phone is plain boring. If you don’t have a smartphone or own a caged one (read Windows and iOS), then there’s nothing you can do about it. But as you own a Karbonn A12+ which skis on the not-so-old Android 4.2 i.e. Jelly Bean and also because I have done all the hard work, you can simply flash a zip file to get rid of the old stuff and move on to something refreshingly new.

And for the time when you start getting bored of even these new graphics that show up on the boot, we shall be covering the steps to create you own Boot Animation and Boot Logos for Mediatek devices. We have already covered changing the Boot Animation on any Android device.

This article will also be more helpful to those who don’t have enough time to create the boot logo and boot animation themselves but still don’t want to leave it at stock.

Disclaimer:

I can’t believe I am typing this again! Still, it is my duty to declare that anything that you do from the instructions given on this page might harm your phone and we might not be able to help you out in all cases. Rest assured, I have tested the zip file I am posting about on my Karbonn A12+ and it is working perfectly fine.
Updated Boot Logo, looks even more brilliant
on Karbonn A12+'s awesome display

How to change Boot Logo and Animation on Karbonn A12+:

  • First of all, you need to have installed clockworkmod recovery on your Karbonn A12+. To install clockworkmod recovery, you will have to root it too. Please be warned that doing both of these things will void your warranty temporarily unless you restore things to factory state later on.
  • Download Karbonn A12+ Boot Graphics Modder Droidiser.zip and copy it to your sdcard
  • Boot into Clockworkmod Recovery. On your Karbonn A12+, you have first switch off your phone. Once your phone completely powers off (this is indicated by a vibration), press and hold Volume Up + Power button. When a screen with three options appear, use Volume Up to scroll to Recovery Mode option and then press Volume Down to get to Clockworkmod recovery.
  • Select Install zip from sdcard option and depending on the location where you pasted the zip file in step 2, locate and flash the file.
  • Press the back button and select Reboot option. Notice the new boot logo and animation that appears now.
This is it. If you went through the first two steps i.e. rooting and installing clockworkmod recovery on your phone, I don’t think you would have any problems in following these easy steps.

Karbonn A12+ on Droidiser: Complete Coverage

The only development work, if any, is occurring on Karbonn A12+, it is bound to be Droidiser, at least upto now.
How to Root Karbonn A12+
Change boot logo and animation on Karbonn A12+
How to install clockworkmod recovery on Karbonn A12+
Enable Daydream mode on Karbonn A12+
Karbonn A12+ Detailed Review

Huawei Ascend 6: Not to Be Ignored

$
0
0
Now proclaimed the World’s Slimmest Phone, the skinny Huawei Ascend P6 is truly something to be reckoned with. While it has by no means caught up to the glory of the iPhone, Samsung Galaxy S4 or HTC One in terms of sales, the mobile smartphone has done an impressive job on the specs scene, and deserves a major nod for its style and practicality. The recently released P6 seems at first like an amalgamation of myriad different features from various other mobile phones, but the distinctive Chinese Huawei look and feel shines through when it comes to the little things - like the Magic Touch feature, a brilliant innovation which allows to use your touch screen even with winter gloves or mittens on, and the headphone jack/SD card/SIM slot all in one portal.

Though Huawei runs an Android based platform, it comes with an included, skinned user interface called Emotion. Though Emotion doesn’t add more than a few little icings on the cake of Android, it is useful for one thing. Customize, customize, customize is the law of the operating system, as it lets you create different profile settings for various environments (think sleeping, driving, being in meetings and being outdoors), and create a changeable Me Widget with everything you need for your home screen.

The bright, crystallized 4.7 inch display is a nice partner to the phone’s diminutive width and weight, but unfortunately the thin thing evidently didn’t have enough room for a reasonable battery in it. The battery life is paltry, not even lasting a day with full use. Unless you have charging availability with you at pretty much all times, watch out when taking advantage of the camera, video, music and browsing capabilities of the phone, as those activities will drain battery more than anything else.

The P6 comes with a full 2 GB of RAM, a great help when running heavily featured apps that are available on the Android system. With the on-phone storage set at only 8 GB, the Huawei comes in far under most current smart phones on the market who are coming out with 16, 32, and 64 GB sizes of space. Thanks to the SD card slot, you could bump up the storage by another 64 GB if you wanted to. But be sure not to forever remove the tiny pin that you must take out to place the SD card in. This useless bit of hardware is simply meant to be lost, it seems, so if you’re determined to forget about it, at least make sure you put it in a safe place beforehand.

Camera-wise the Huawei is quite good. With 5 megapixels in the front and 8 in the back, it is more than decent, but yet not excellent. Those who want to use their smart phone as their primary camera should look elsewhere, such as the Nokia Lumia 1020, but the reasonably effective zoom and the colors and clarity of shots made with the P6 are enough to satisfy most casual photographers.

The P6 runs up a bill of about £300 unsubsidized without a contract, and can be had for about £26 per month from a contract provider like Orange. This is a good £150-£400 less than what some of the other smart phone beasts in class with the P6 cost on their own. If you can get over the rather sad state of the battery life and a few bits and pieces of annoyance like the headphone jack situation, the Huawei P6 handset is both a cost-effective and classy choice, a rare combination in the technology world.

The benefits of purchasing cell phone cases

$
0
0
Good cellphone accessories are very important to protect the smartphone and enjoy its complete benefits. Cellphone cases are highly useful as it can not only protect the body of smartphone appropriately but it also helps to preserve the appearance of the model for a long time. Our day to day activities can be tough for our cellphone. So we have to use a good cell phone case to protect the device appropriately.

Every smart phone model requires different cell phone case. The shapes and sizes vary from one model to another. So you can get the cell phone case according to your choice. A good brand do not like to compromise with quality. So if you are purchasing a genuine cell phone case then it can protect the device efficiently. The appearance of these cases is attractive. So you will love to use it. Many times we want to use a particular model for a long time. It can be an emotional reason or financial reason. So if we are keeping that model in a cell phone case then we can protect it for a longer duration. They also provide the ways of personalizing the model with ease. It will depend on your lifestyle and preferences. You can easily get a good cell phone case as per your inclination.

These cases can protect your smart phone from external dangers effectively. Dust, accidental falls, and water can damage the model. So it is necessary to provide the protection.  Nowadays the trend of matching clothes with cell phone is also common. It looks attractive. So in both the cases you can utilize a good cell phone case. They are valuable provided we use it appropriately.

Many cell phone cases can also control the level of heat. We can easily find that many models generate heat if we use it for a long time. Therefore if you are using a good cover, you can protect the device comfortably. We have to keep the cell phone in pocket or bag. So we cannot deny that scratches can make the device unattractive. Screen can have a number a number of issues. So a good cell phone case can protect the device from scratches. Moreover it will be easy for you to carry the cell phone easily. So you can protect your cell phone easily with its cases. Furthermore you can make the device striking through it. There are various sources through which you can get a good cell phone case. However if you purchase it online then you can get an attractive deal. You will get it in an economical range in comparison to the local store available in your area.


One of the best places to get a good cell phone case is handgiftbox.com. Samsung Note 3 is the hottest Android model of the market. Therefore if you want to purchase the case for this model then you can check Hot Sale Minions Design Protective Case for this model. This case is available in Black and Blue color. The dimensions of this case are 18*10cm and it weighs 0.12Kg only. It is an excellent back cover designed with Silicone material.

Improve any Android device's sound quality using this audio hack

$
0
0
Xda-developers has been a home to countless number of modifications out there. Xda recognized contributor zhuhang developed a Sound Mod quite a few months back. Viper4Android, the sound mod, has since been downloaded hundreds of thousands times and has been really popular with custom rom developers and advanced users alike.

As my previous android device had a pretty good sound output, I never really felt the need to install an audio mod. Karbonn A12+, my current phone, phone produces too much treble and at full volume, the speaker sounded rough while playing some songs. Thus started my search for finding a good sound mod. The only two options I had were Acid Sound Mod and Viper4Android Sound Mod. I tried installing Acid mod but the phone, running on AOSP 4.2, got stuck in a bootloop and I tried the next option- Viper4Android.
Note:Here is a discussion on Acid vs Viper I found later on.

The results were good and my speaker sounds much better now. Disabling and Enabling the V4A-SpeakerFX with a song playing in the background makes the difference pretty much clear. Though I don't understand what most of the terms written below mean, here are the features of Viper4Android Sound Mod:
  • Supports Android version 2.3 to Android 4.4 (some Kitkat roms are supported)
  • Haas Effect
  • Viper Fidelity Mod
  • Headphone Surround+
  • Curetech+
  • Convolver

How to install Viper4Android Sound Mod [Root Only]:


  • Download the latest version of the Viper4Android FX here.
  • Extract the zip file and install the version suitable for your Android version.
    Note: If you haven't already, you will have to enable (installation of apps from) Unknown Sources first.
  • Open the app and grant it superuser permissions. It will ask you to Install sound drivers, just confirm the action and when it completes, reboot your phone.
  • Open the app again and enable the settings you like. You will see different settings for your Phone's speaker, Headset and Bluetooth Device. Play a song, fiddle around with the settings and notice the difference.
Viper4Android is going to stay on my Karbonn A12+ as long as it (the phone) lasts, what about you? I did ask a few of my friends about how they liked the difference, almost all of them gave Viper4Android a thumbs up.

Share your feedback about the Sound Mod in the comments section below or head over to the official thread here. If your speaker/headset suddenly started sounding more melodious, do consider donating a beer to the developer and sharing this tip with your friends.

How to enable Navigation Bar (on-screen soft buttons) on any Android device (ICS+)

$
0
0
If your Android 4.0 or above device has hardware buttons and you fancy the on-screen buttons that show up (or hide) on the Nexus 4 and 5 (and some other devices with no hard buttons), then this article will help you fulfill this little dream of yours in some easy little steps.

Requirements:

  • An Android device running Android version 4.0 (Ice Cream Sandwich) and above
  • Root access (yet another perk)
  • A few spare minutes
  • 10 grams of human brain
Hope you weren’t a big fan of the Brain Surgeon (Dexter). Even if you were, don’t take the last requirement too seriously.

Steps to enable Nav Bar on your Android Device:


  • If you don’t already have, download a file explorer with root permissions. Root Explorer and Solid Explorer are my favorites among the paid ones, but the free ES File Explorer will perform the job equally well
  • Open whichever File Explorer you will be using to follow this guide.
  • Get to the root of your device. Doing so differs from one file explorer to another. On Root Explorer, the default tab is the root of the device.
  • Once in root, go to /system.
  • Locate the file named build.prop
  • Again, depending on which file explorer you are using, open the build.prop file in a text editor. In Root Explorer, this can be done by long pressing the build.prop file and then selecting the “Open in Text Editor” option.
  • Get to the end of this file and add the below line there:
              qemu.hw.mainkeys=0
  • If, at a later point of time, you feel the urge to disable the nav bar, just change the zero in the line you added above to 1 or simply remove this line.
  • Also, you might want to disable your hardware buttons (the ones below your screen that you originally used to navigate). To do so, use Button Remapper or Xposed Additions (an Xposed module)

That should be it. Though I tried to sound as clear as possible, if any of the steps above caused ambiguity in your mind, the YouTube video embedded above might help you out. If you still have any doubt about any of the things we guided you about above, it is pretty simple to comment on this post!

How to enable threaded comments on Facebook Profile/Timeline

$
0
0
On 25th March, 2013, Facebook Fan pages with over 10,000 likes got the option to opt in to the then upcoming threaded comments system. On July 10, this option was turned on for all Facebook pages and personal profiles with over 10,000 followers. If you have ever been on Reddit or Quora, you will most probably adore the threaded comments style implemented there. If that is the case and you aren’t a popular celebrity, then we shall help you activate the coveted Reply button on your timeline which will allow you and other to reply to a particular comment and thus having a threaded conversation.

I’m not pretty sure why this trick works,but as long as it does (or Facebook rolls it out for everyone), why should we care? So, here are a few easy steps to help you get this on your Facebook timeline:

  • Make sure that you are on a PC/Laptop with an internet connection.
  • If you don’t already have, install Google Chrome on your PC. (Though Firefox will also work fine, but you will have to find a suitable extension and check if it works. If you are on Chrome, we have done the hard work.)
  • Install the Manual Geolocation extension on Chrome.
  • On the right side of the omnibox, click on the >> button and click on Manual Geolocation. A small popup windows will appear.
  • Type Wellington, Plimmerton, Napier or any other location you know of that belongs to New Zealand. (It was Wellington in my case) in the Enter a Location text field.
  • When the map showing the location you entered in the text field appears, double click on the location (in New Zealand) you want to pretend you are sitting at.
  • Go to http://touch.facebook.com and click the Check In button.
  • Select any New Zealand location using the search box. If you had set your location correctly using Manual Geolocation, you will automatically see suggestions based on your spoofed location.
  • Once you check in, try commenting on your check in, if a reply button appears below your comment (beside the Like button), then you have successfully activated threaded comments on your profile.


Note: The reply button (or the threaded comments style) will be activated only on your future posts, not on the ones you made before using the steps above.

If you find the threaded comments system useful enough and would like it activated on your friends’ profiles too, then share this story with them and spread the torch of knowledge!

Top 10 Hidden features to activate on Google Chrome

$
0
0
Since its launch in 2008, Google Chrome has become (one of the) world’s most popular web browser on PCs, thanks to its speed and integration with Google services among other things. Google keeps on pushing updates to Chrome, rectifying bugs and adding features while keeping the UI minimalistic.

Among these added features, some are not ready to be enabled by default and users are given the opportunity to enable them individually. All such untested features are available for toggling at the url chrome://flags. I am having Google Chrome v33.0.1750.22 which was the latest beta version at the time of download. As of at the time of writing, the latest beta is v33.0.1750.46 and can be downloaded here. Here are some of the interesting and useful experimental features I found hidden among the huge pile.

One added perk you will enjoy when you install the updated version of Google Chrome is that you no longer have to worry about people snooping around your saved passwords. A new feature automatically enabled on the newer versions of Google Chrome require you to reauthenticate yourself by entering your machine's password before you can view your saved passwords in plain text.

Before you Begin:

  • Depending on the version of Chrome you have installed, some of the experimental features mentioned below might not be available on your PC. That’s why it is recommended to have installed the latest beta version of Google Chrome from here.
  • Google’s warning over the use of experimental features:
These experimental features may change, break, or disappear at any time. We make absolutely no guarantees about what may happen if you turn one of these experiments on, and your browser may even spontaneously combust. Jokes aside, your browser may delete all your data, or your security and privacy could be compromised in unexpected ways. Any experiments you enable will be enabled for all users of this browser. Please proceed with caution.
  • If you feel the browser is not working as expected and want to roll back all the changes you have made, click the Reset all to default button present on the top right of the Flags page.
  • If you are reading this article on Google Chrome on your PC, you can right click on the feature name and select Copy link address. Then open a new tab and paste the copied link in the new tab and press Enter. Otherwise, go to the url chrome://flags on Chrome, press Ctrl + F and search for one fo the features mentioned below and activate it.

10 Hidden Features you always craved for on Google Chrome:

  • Enable Download Resumption:
    I had been looking forward to this personally since I had started using Chrome four years back. So, obviously, I jumped at the opportunity to enable it and you might want to too. Until you enable this option, Google Chrome downloads a file from the beginning once the download is interrupted (due to, say, loss in internet connectivity) no matter whether the server that is hosting the file supported resuming downloads or not. Not only the restarted download caused annoyance, it also lead to wastage of your data. This feature has been present in Firefox since ages.
  • Enable Offline Cache Mode:
    If you are not connected to the internet 24x7 or want to go back to a page you read a few minutes back but disconnected from the internet just now, enabling offline cache mode will complete read requests from available stale cache entries.
  • Ignore autocomplete=’off’:
    Some websites request the browser to not autofill the form on that page. Enabling this option will ignore a web page’s request to turn autocomplete off and thus save you the hassle of filling it manually, if you have enabled Autocomplete on Chrome, that is.
  • Enable new Translate UX:
    If you disliked the infobar that slid down below the Omnibox (or bookmarks bar) offering you to translate the web page when you were on one with foreign language, enabling this option will activate a new UX which is more visually appealing (at least to me).
  • Enable new profile management system:
    If your PC isn’t that personal and you share your Google Chrome with your family/friend, enabling this new profile management system brings new features such as profile sign-out and new avatar menu UI.
  • Google Now:
    If you love Google Now notifications on your Android/iPhone, enabling this option will turn on Google Now notifications support on your Google Chrome.
  • Enable experimental UI for Notifications:
    As Google states it, this option enables “various Notification Center features under construction/polish”.
  • Stacked Tabs:
    If you don’t like the way the tabs shrink when you open a couple of dozens of them, this option will change the way the tabs are arranged. The image below will  make the situation crystal clear.
  • Enable scroll prediction:
    According to the mini-description given below this option, Chrome will predict your finger’s future position thus giving it time to load that frame before you finger actually reaches there. As scrolling wasn’t that bad already on my PC, I didn't notice anything significant on enabling this but this sure sounds cool!
  • Enable Tab Browser Dragging:
    If you are accustomed to the way you are allowed to drag an open tab to create a new window containing that tab only on Internet Explorer, Firefox or Opera, enabling this option on Google Chrome will let you do the same.
I hope you didn’t face any problem while enabling/disabling any of these features. If the descriptions I gave for any of these features wasn’t clear, google that term for a better understanding. As I stated in the Before you Begin section above, if Chrome starts behaving abnormally for you, you can reset all the changes you made by a single press of the Reset all to Default button. If the changes you made above sound cool, share this story with your friends who happen to be Chrome users to spread the knowledge.

How to unbrick Karbonn A12+ using Clockworkmod Recovery

$
0
0
Lately, Karbonn A12+ has been covered a lot on Droidiser. The main factor behind that is that because Karbonn A12+ is my primary phone since the past three months or so. During this period of time, we’ve learnt how to root, install Clockworkmod Recovery, enable the hidden DayDream feature and change the boot graphics on Karbonn A12+. Though this might look like quite a bit of development(-ish) work for the phone, we’ve missed a really important part: Unbricking the Karbonn A12+ once we’ve bricked it. You can blame my exams for keeping my away from this blog for a long time and the fact that Droidiser is the only blog which is behind any serious development that has happened for the device.

There are three scenarios that can happen once you are soft bricked:
    Karbonn A12+ Clockworkmod Recovery
  • You have installed clockwork mod recovery and had taken a nandroid backup of your device when it was booting up fine and was working perfectly. If that is the case, you don’t need this guide. All you need to do is boot into your clockworkmod recovery by pressing and holding Volume Down and Power button when your phone is switched off. Once you boot into the clockworkmod recovery, go to Backup and Restore and select Restore. Once done, your phone will be restored to the exact state it was when the backup was created.
  • You haven’t installed clockworkmod recovery but played with it just enough to brick it. Clearly, you didn’t follow the guidelines we often recommend in order to keep your phone up and running. You should have installed clockworkmod recovery before playing around with other things. Generally, even if you don’t have installed clockworkmod recovery, you can recover your phone by flashing either cwm recovery first and then flashing a backup or by flashing the entire stock rom. Sadly, in case of Karbonn A12+, none of this is working. Installing Clockworkmod recovery through SP Flash Tool is giving error 8038. I tried googling but in vain. Another method to install clockworkmod recovery is through Fastboot by giving the command fastboot flash recovery recovery.img but even that isn’t working and this error pops up: partition ‘recovery’ not support flash. I shall keep you posted on this if I am able to work around these errors to get a working solution.
  • You have installed clockworkmod recovery but don’t have a nandroid backup of your phone. If that is the case, continue with this guide.

Unbricking Karbonn A12+ using Clockworkmod Recovery:

  • Download the Karbonn A12+’s nandroid backup. A big thanks to chukzde for taking the time to upload this and make this guide possible.
  • Copy the zip file you downloaded above to the external sd card of your phone. (We’re assuming you aren’t able to access the internal sd card of your device as it is soft bricked, otherwise copying the file there would also work perfectly fine).
  • Take your Karbonn A12+’s battery out and re-insert it after 5 seconds. Now, press and hold Volume Up and Power button till the phone boots up. Using Volume Up, get to the Recovery option and press Volume down to select it.
  • Once you boot into clockworkmod recovery, use Volume Up and Volume Down to scroll and use the Power button to select a highlighted option.
  • Select the Wipe Data/Factory reset option. Then select the Advanced option and choose the Wipe Dalvik Cache option.
  • Finally, select Install zip from sdcard option and select the zip file you copied to your sd card in step 2.
  • Once the zip file installation completes, select the Reboot phone option to power on your device which you just unbricked yourself!
Bingo! I bet this wasn't as daunting as it might have seemed at first. Enjoy your unbricked device now and keep experimenting, as repeating this process won’t take any longer than 5 minutes.
Viewing all 557 articles
Browse latest View live